Installing Self-Signed certificate to iOS 13 / macOS 10.15
by Lukas Kukacka
This is a followup of previous post about Generating Self-Signed certificate compatible with iOS 13 / macOS 10.15.
However, just using such a certificate on your server and connecting to the server is not enough.
Disclaimer:
I don’t take any responsibility for potential damage or harm caused by following information in this post. Please make sure you understand what you are doing and potential risks of your actions. Accepting unknown certificates may expose you to security threats!
Installing and trusting certificate on iOS 13
Install certificate
Tip:
If your prefer images, this page seems to have screenshots of the whole process. No guarantee though! 🙂
- Get the certificate to iOS device
- AirDrop works well. It will tell you directly “Someone would like to share a profile”
- Opening the certificate from iCloud Drive works fine
- Email should work as well
- Once received or opened, the certificate will become available in Settings
- Go to Settings → General → Profile & Device Management
- Select the new certificate in “Downloaded profile” section and check if all certificate information is correct (i.e. it is really your certificate)
- Tap “Install”, you end up on information screen, read the information 😀, tap “Install” again and confirm once again.
Trust certificate
Certificate is installed, now it has to be trusted.
Please follow steps at Apple support page: Trust manually installed certificate profiles in iOS and iPadOS .
Installing and trusting certificate on macOS 10.15
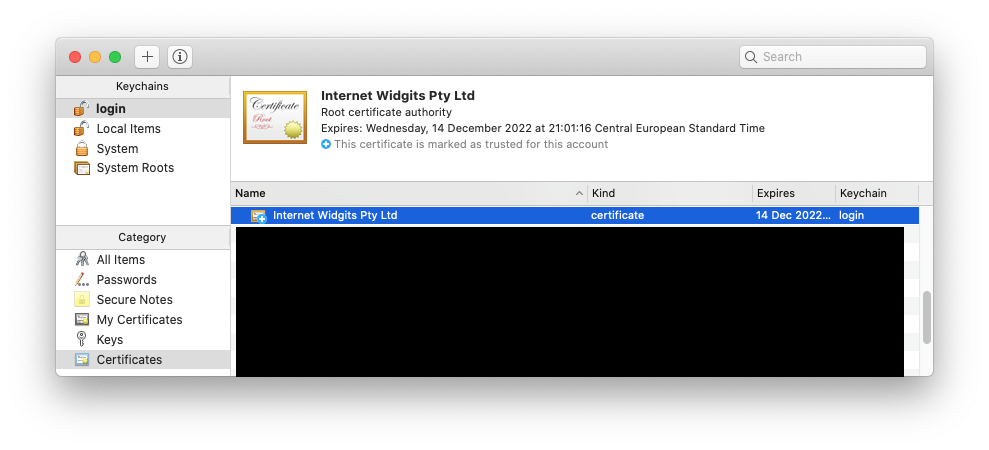
- Import the certificate to Keychain (Double click it or drag&drop it to Keychain)
- Select the certificate in Keychain
- Cmd+I or Right click → Get Info
- Expand the Trust section
- Change “When using this certificate: to “Always trust”
- Close the window. When closing the window, you will be asked for Touch ID or password to confirm the change
- Done. The certificate will now have little plus symbol on its icon in Keychain

Like the article, got a comment or found an issue? Get in touch via Twitter .
Subscribe via RSS